CHAPTER 5. Documents, SpellCheck, Printing
Documents 1. Converting a Template to Document
I. Converting a TEMPLATE to DOCUMENT.
You have entered your CLIENT's INFORMATION FILE and merged it with a TEMPLATE to create a MERGED FORM on the screen. Before printing, you have the option to save and edit a "snapshot" of the MERGED FORM, called a DOCUMENT. A DOCUMENT becomes a separate entity from the CLIENT INFORMATION FILE and TEMPLATE that originally created it. Here are the unique features of a DOCUMENT:
1. Combined Client Information and Template file (MERGED FORM) are saved as a single file (instead of the information existing in two files.)
2. CONDENSE function does not work while editing a DOCUMENT. If you do not want your DOCUMENT to have checkboxes and unused paragraphs, CONDENSE the MERGED FORM before using it to create a DOCUMENT.
3. Converting a final MERGED FORM to a DOCUMENT can be used to indicate which forms have been completed so far in your case.
4. DOCUMENTS will not interact with additional information entered in a case (useful in some situations!!). If you want to return to a sharable or interactive mode, you can always re-create the MERGED FORM that created the DOCUMENT you were editing. Do this by pressing 6 (FORMS MENU), and re-selecting the appropriate TEMPLATE (Client, State, or Modified).
5. Can be more flexible when a particular form needs non-standard editing, or when creating non-mandatory forms.
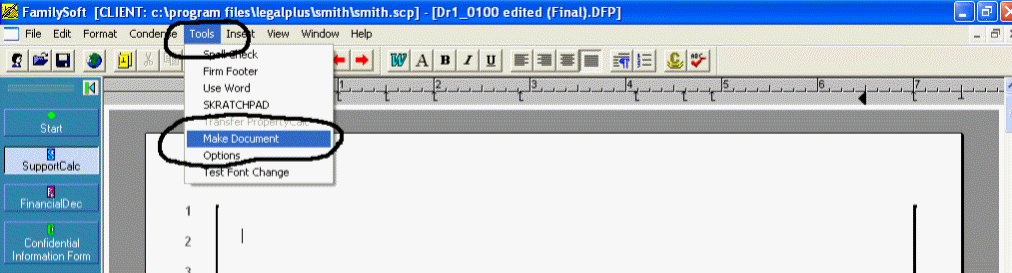
To convert a MERGED FORM to a DOCUMENT, click Tools, then Make Document:
A window will open, and you will have a chance to uniquely name your DOCUMENT. If you do not rename it, FormPAK™ will use the template name it was derived from as the default name. Note that it will be saved in you current client directory:

Naming a Document
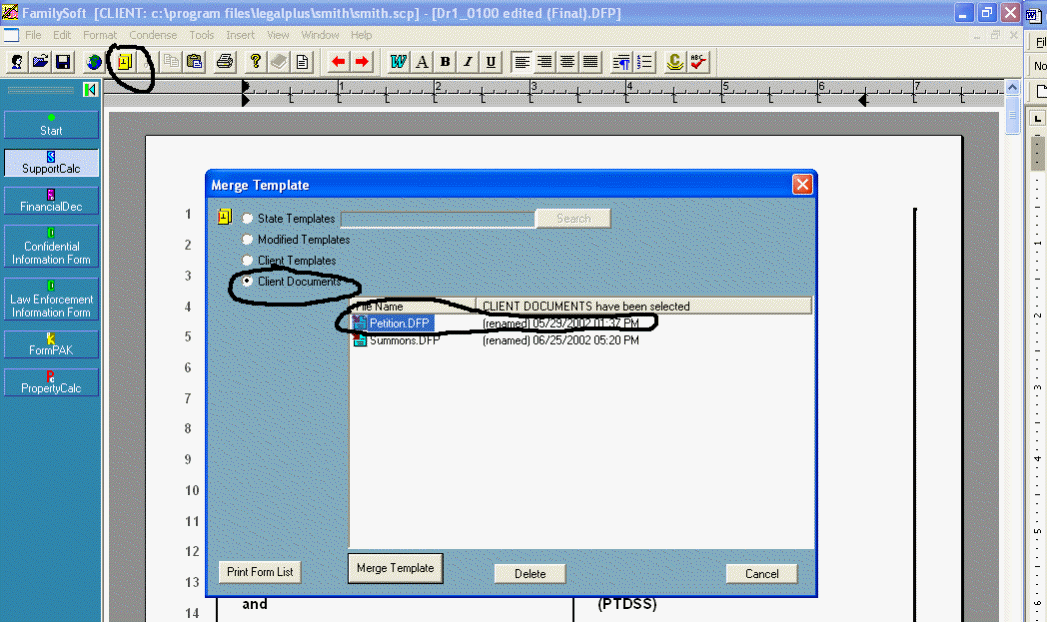
To retrieve a DOCUMENT, click the Merge Template menu button ![]() . Select Client Documents. You will see a list of the prior DOCUMENTS you have saved. Double click on the document you wish to retrieve.
. Select Client Documents. You will see a list of the prior DOCUMENTS you have saved. Double click on the document you wish to retrieve.
Retrieving a DOCUMENT
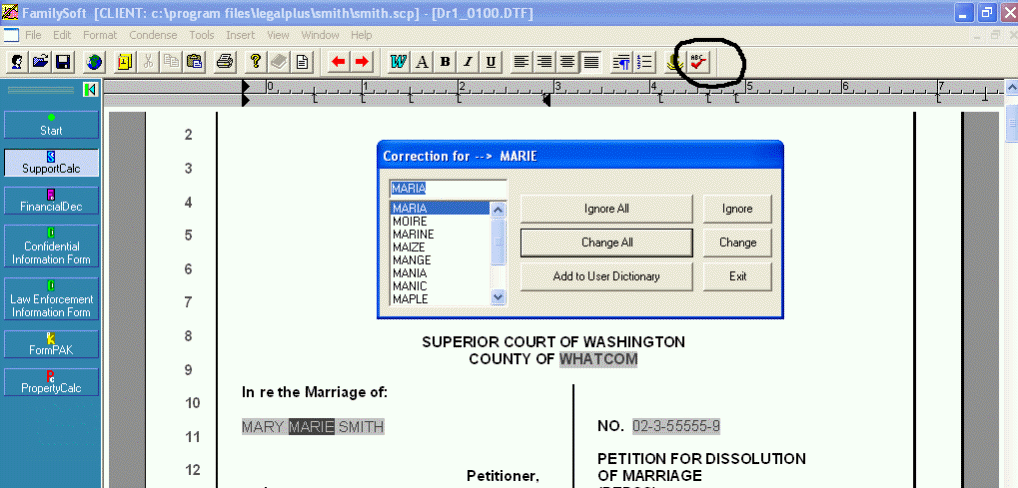
FormPAK™ helps you check the spelling in your form. To begin spell checking the form you are editing, click on ![]() to access the SPELL CHECK MENU. Your screen will look like the following:
to access the SPELL CHECK MENU. Your screen will look like the following:
Spell Check
When Spell Check finds a word it does not recognize, it highlights the word, and a Corrections window appears. You can select a word from the list by highlighting a word from the list, and clicking Change. Your other choices are to Ignore the word, or Add it to your Dictionary.
When the spell check is complete, a box will appear on your screen indicating "Spell checking Session is over." And display the number of words check and misspelled. Click on OK to exit.
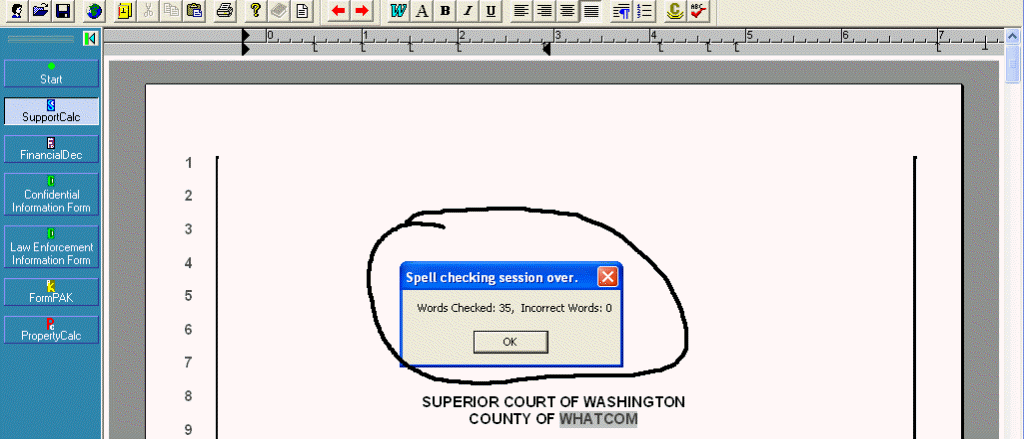
Exiting Spell Check
You can preview the finished Merged Form or Document anytime by clicking on File on the toolbar, then Print Preview. You will see the entire Merged Form or Document on the screen just as it will print, showing line numbering and footers. Click on Close to return to the edit mode.
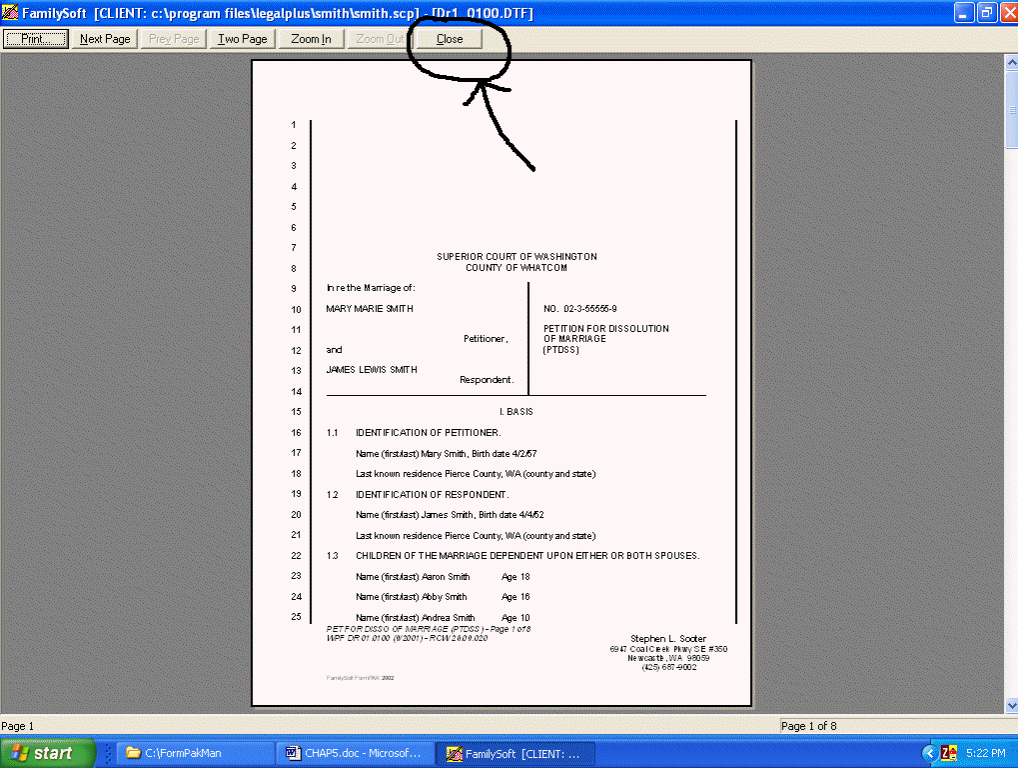
Print Preview
You can Zoom in or out, Move from page to page, or Print by clicking on the appropriate buttons at the top of the screen.
You can print your Merged Form or Document at any time by accessing the Print function. Do this by clicking on the Print Icon ![]() . You can also access Print from the File option on the toolbar, or while viewing the Merged Form or Document under print Preview…
. You can also access Print from the File option on the toolbar, or while viewing the Merged Form or Document under print Preview…
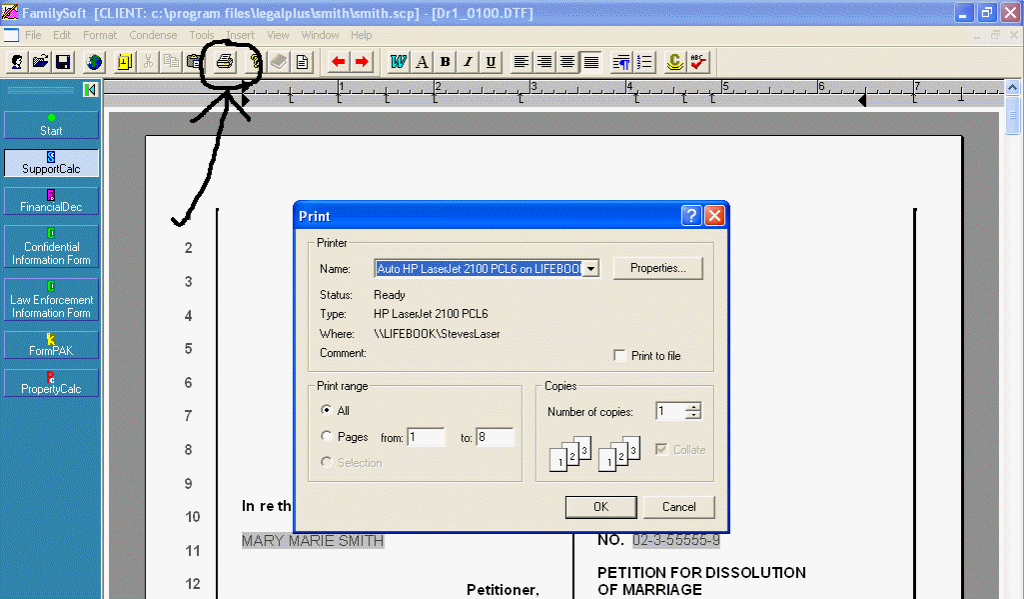
The Print window allows you to print the entire Merged Form or Document, or select a range of pages. It will print using the default printer you previously setup in Windows.
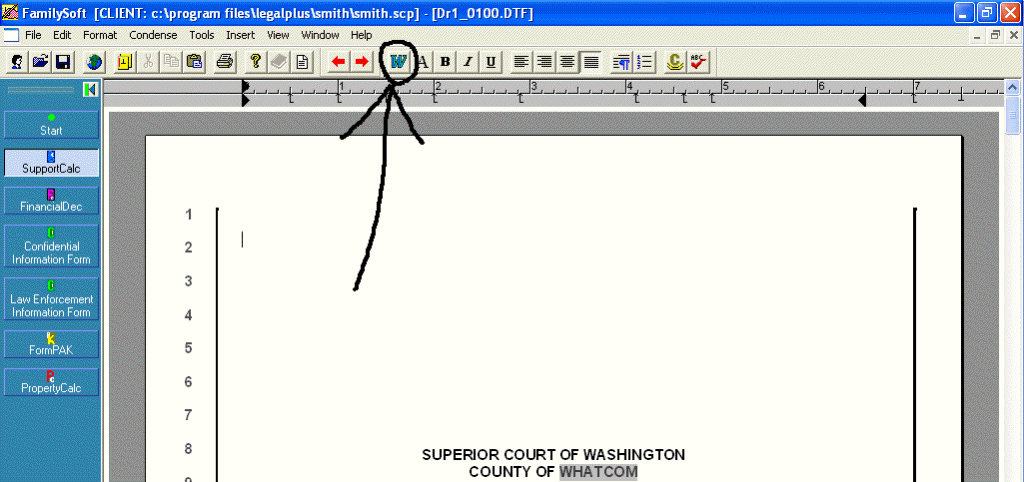
V. Sending the your Merged Form or Document to Microsoft® Word®
This feature is available to users having Microsoft® Word® on their computer. Clicking on the ![]() on the toolbar will immediately load the current Merged Form or Document into Microsoft® Word®. Great care has been taken to assure that all formatting goes over to Word® with the document. You edit and save according to the features of Microsoft® Word®. Exit out of Microsoft® Word® to return to FamilySoft™.
on the toolbar will immediately load the current Merged Form or Document into Microsoft® Word®. Great care has been taken to assure that all formatting goes over to Word® with the document. You edit and save according to the features of Microsoft® Word®. Exit out of Microsoft® Word® to return to FamilySoft™.